> ## Documentation Index
> Fetch the complete documentation index at: https://platform.kimi.ai/docs/llms.txt
> Use this file to discover all available pages before exploring further.
# Use Kimi in OpenClaw
> Build a cross-platform AI agent with OpenClaw and the Kimi API. Install OpenClaw and configure your Kimi API key.
OpenClaw (formerly Clawdbot and Moltbot) is an open-source, self-hosted AI agent platform that lets you run AI assistants locally. It integrates with WhatsApp, Telegram, Discord, Slack, and Signal to connect large language models to real-world workflows. The platform supports multiple LLM providers, extensible skills, and gives you full control over your data and API keys.
The steps below use OpenClaw `2026.7.1` with the official Moonshot Provider and Kimi K3 for Chat Completion. The old K2.5 preset is not the target configuration in this guide.
`kimi-k2.5` is no longer available to newly registered users. New users should use the official Moonshot Provider and set `moonshot/kimi-k3` as the default model. Enter API keys only in the local wizard or terminal; never put them in docs, screenshots, repositories, or chat messages.
## Prerequisites
Complete these prerequisites before you start. Follow the official installation, source, and account links below; this guide focuses only on configuring Kimi in OpenClaw.
Install or update OpenClaw using the official entry point.
Review the official repository, releases, and change history.
Create and keep private an API key from the international Kimi Open Platform.
Your account needs available balance to use Kimi K3. See [Rate Limits](/docs/pricing/limits) for current tiers. If your organization uses an IP whitelist, follow [Organization Best Practices](/docs/guide/org-best-practice) and add the public egress IPv4 address of the calling computer or gateway.
## Set up Kimi K3
Make sure OpenClaw is installed from the prerequisites above, then install or update the official Moonshot Provider:
```bash theme={null}
openclaw plugins install @openclaw/moonshot-provider
openclaw gateway restart
```
Run onboarding:
```bash theme={null}
openclaw onboard --auth-choice moonshot-api-key
```
In the wizard, choose:
* **Step 1: Model.auth provider > Choose Moonshot**
* **Step 2: Model AI auth method > Choose Kimi API key (.ai)**
* **Step 3: Enter Moonshot API Key (.ai) > Enter your international API key**
* **Step 4: Default model > Set it to `moonshot/kimi-k3` after onboarding**
If K3 is not shown in the wizard, finish authentication first, then run:
```bash theme={null}
openclaw models list --provider moonshot
openclaw models set moonshot/kimi-k3
```
If the stable Provider catalog still does not include K3, upgrade the plugin and restart the Gateway:
```bash theme={null}
openclaw plugins update @openclaw/moonshot-provider
openclaw gateway restart
openclaw models list --provider moonshot
```
Screenshots from the old onboarding flow may still show the historical `Moonshot AI (Kimi K2.5)` or `moonshot/kimi-k2.5` preset. This guide no longer uses that preset; follow the text steps and the K3 model selector screenshot below, and do not keep the old default model.
If K3 is still missing after the upgrade, add a K3 entry to `models.providers.moonshot.models` in `~/.openclaw/openclaw.json`, keeping existing models:
```json theme={null}
{
"models": {
"mode": "merge",
"providers": {
"moonshot": {
"baseUrl": "https://api.moonshot.ai/v1",
"api": "openai-completions",
"models": [{
"id": "kimi-k3",
"name": "Kimi K3",
"reasoning": true,
"input": ["text", "image", "video"],
"contextWindow": 1048576,
"maxTokens": 8192,
"thinkingLevelMap": {
"off": null,
"minimal": "max",
"low": "max",
"medium": "max",
"high": "max",
"xhigh": "max",
"max": "max"
},
"compat": {
"maxTokensField": "max_tokens",
"supportsUsageInStreaming": false,
"requiresStringContent": true,
"supportsReasoningEffort": true,
"supportedReasoningEfforts": ["minimal", "low", "medium", "high", "xhigh", "max"]
}
}]
}
}
}
}
```
To route image and video inputs through K3 as well, add this to the same configuration:
```json theme={null}
{
"agents": {
"defaults": {
"imageModel": "moonshot/kimi-k3"
}
},
"tools": {
"media": {
"image": { "models": [{ "type": "provider", "provider": "moonshot", "model": "kimi-k3", "capabilities": ["image"] }] },
"video": { "models": [{ "type": "provider", "provider": "moonshot", "model": "kimi-k3", "capabilities": ["video"] }] }
}
}
}
```
K3 always uses the server-side `max` reasoning setting. `contextWindow` remains 1M; `maxTokens` is set to 8192 as the OpenClaw per-reply limit, so the 1M input window is not mistaken for a 1M output limit. Keep `maxTokensField: "max_tokens"`, `supportsUsageInStreaming: false`, and `requiresStringContent: true` for K3 compatibility: K3 treats `max_completion_tokens`, streaming usage, and array-form pure-text content differently.
## Step 4: Start using OpenClaw
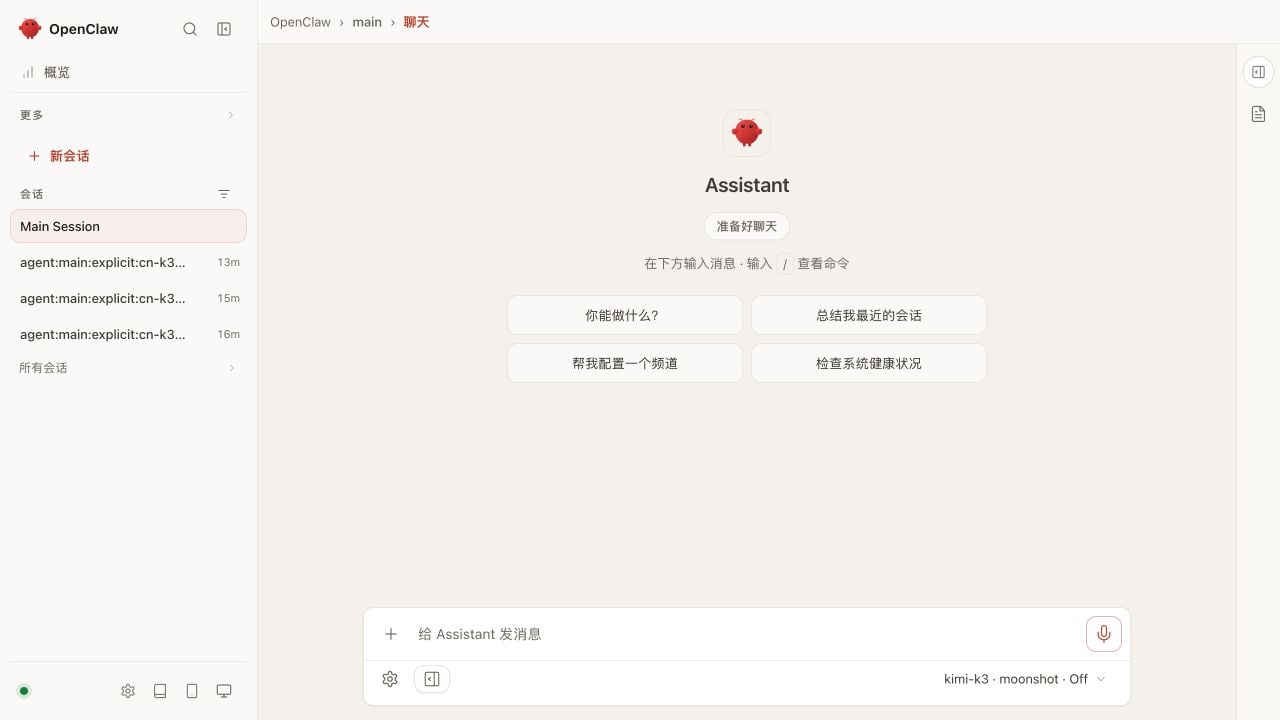
After installation, open the Control UI address shown by the onboarding wizard or Gateway output. The bottom of the Control UI should show `kimi-k3 · moonshot`.
You can now send messages in the chat page. The model selector screenshot is shown above:
 ## Troubleshooting
### 401 / Invalid Authentication
* Confirm that you are using a Kimi Open Platform API key, not a Kimi Code key.
* Use `moonshot-api-key` for an international key; use the Chinese edition for a China-region key.
* If an old key is already present in the environment, rerun onboarding and enter the international key again.
### The Moonshot authentication option is unavailable
Make sure the official Provider is installed and the Gateway has been restarted:
```bash theme={null}
openclaw plugins install @openclaw/moonshot-provider
openclaw gateway restart
```
### K3 is missing from the model list
Upgrade OpenClaw and the Moonshot Provider. If it is still missing, add the K3 entry from Step 3 and run `openclaw models set moonshot/kimi-k3` again.
For more Kimi API guidance, see [Troubleshooting](/docs/guide/troubleshooting).
## Troubleshooting
### 401 / Invalid Authentication
* Confirm that you are using a Kimi Open Platform API key, not a Kimi Code key.
* Use `moonshot-api-key` for an international key; use the Chinese edition for a China-region key.
* If an old key is already present in the environment, rerun onboarding and enter the international key again.
### The Moonshot authentication option is unavailable
Make sure the official Provider is installed and the Gateway has been restarted:
```bash theme={null}
openclaw plugins install @openclaw/moonshot-provider
openclaw gateway restart
```
### K3 is missing from the model list
Upgrade OpenClaw and the Moonshot Provider. If it is still missing, add the K3 entry from Step 3 and run `openclaw models set moonshot/kimi-k3` again.
For more Kimi API guidance, see [Troubleshooting](/docs/guide/troubleshooting).