

- Connect with an API Key from
platform.kimi.ai - Switch an existing Kimi Code CLI setup to Kimi API Platform
- Replace a configured API Key
This guide assumes that Kimi Code CLI is already installed.
- macOS / Linux
- Windows (PowerShell)
kimi executable on your PATH.
Prepare an API Key
Open Kimi API Platform, sign in, and go to the API Keys page. Create and copy an API Key.Connect Kimi API Platform
1. Start Kimi Code CLI
Open the project directory where you want to use Kimi Code CLI, then start it: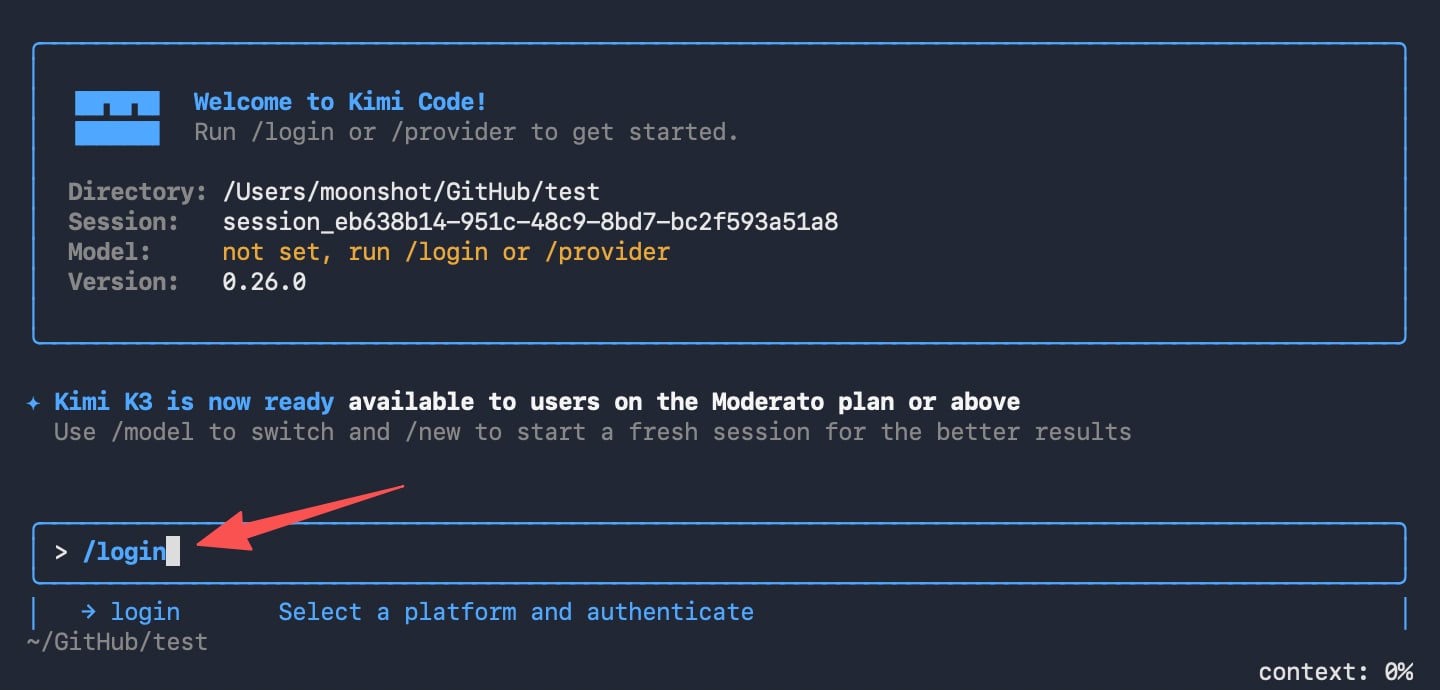
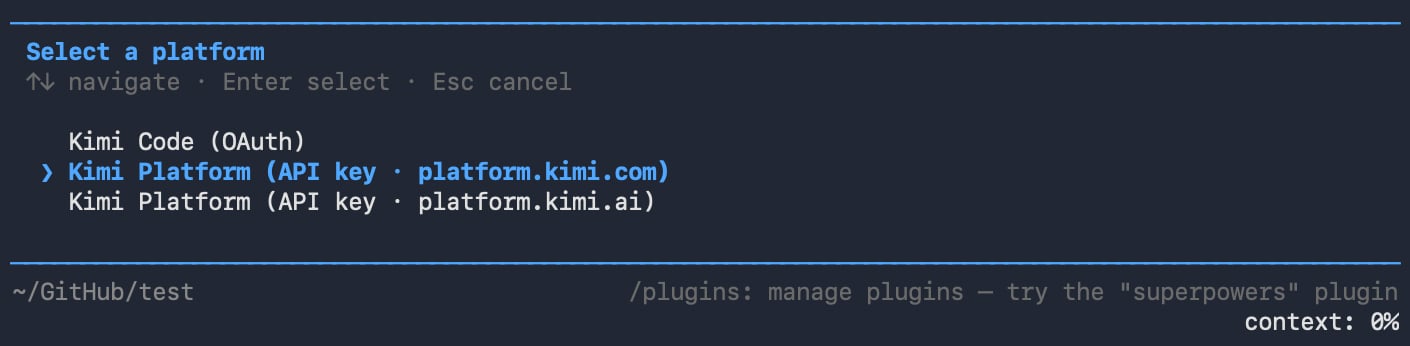
2. Select the API Key platform
Select the option that matches where the API Key was created:
Use the arrow keys to select the platform, then press
Enter.
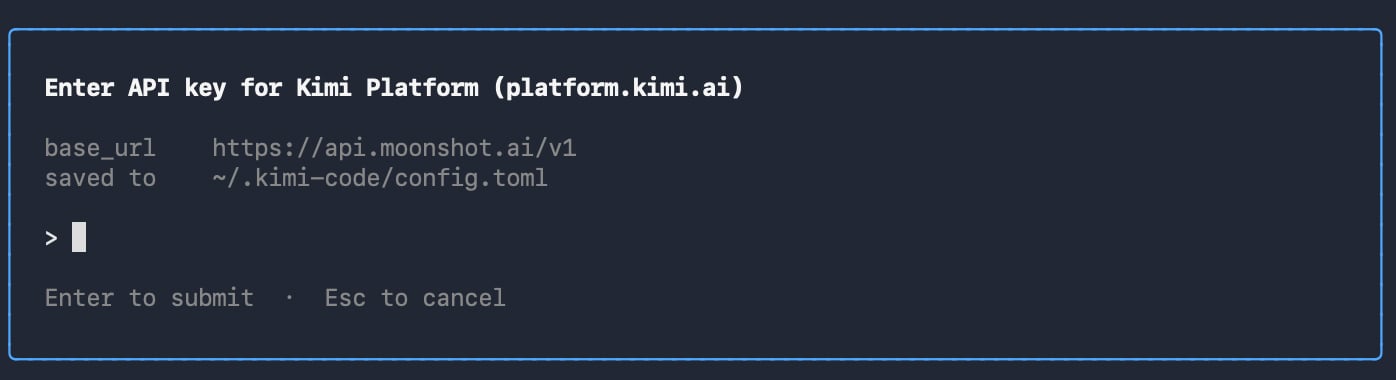
3. Enter the API Key
Paste the API Key when prompted, then pressEnter.
Kimi Code CLI validates the API Key and loads the models available to the account.
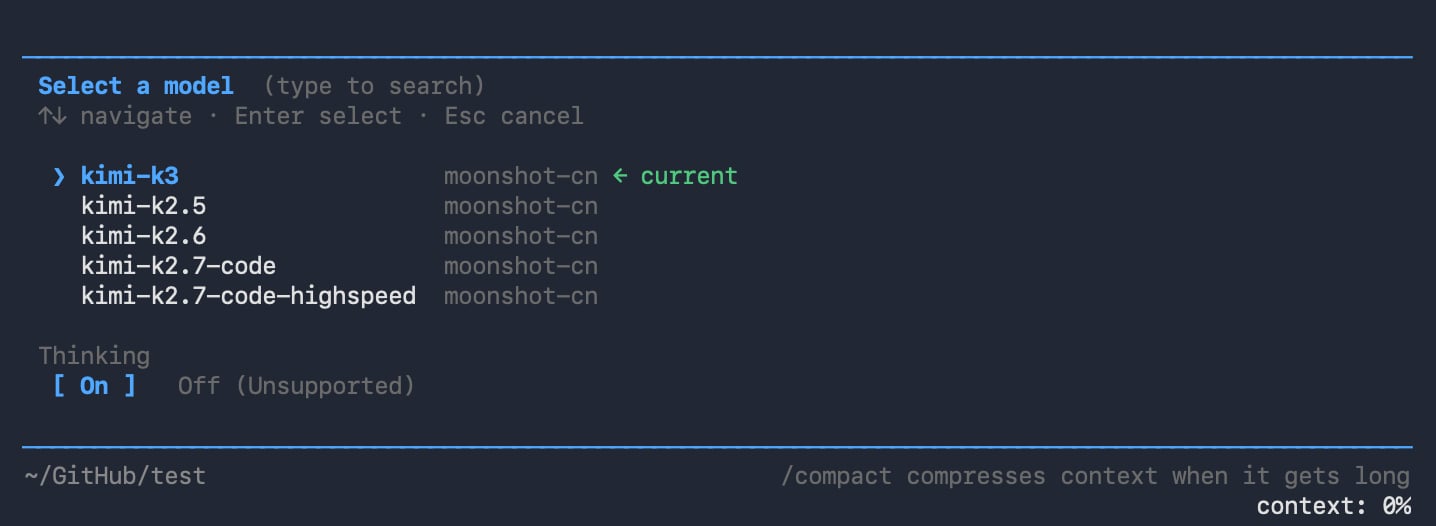
4. Select a model
After the API Key is validated, Kimi Code CLI displays the models available to the account. Select the model you want to use and confirm. Kimi Code CLI then:- Switches the current session to the selected model
- Saves the selected platform and model
- Reuses this configuration on later launches
5. Verify the connection
Run the following command to view the current session status: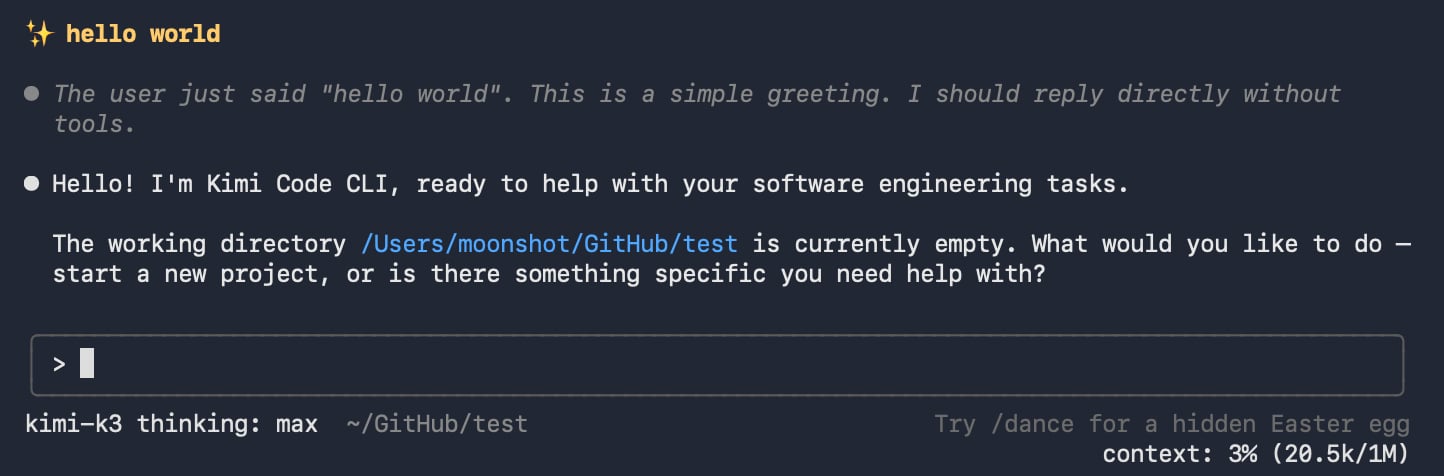
Switch to a Kimi API Platform API Key
If Kimi Code CLI already uses another login method, you do not need to exit the program or edit the configuration manually. Run the following command again in the current session:- Select
Kimi Platform (API key · platform.kimi.ai) - Enter the Kimi API Platform API Key
- Select the model you want to use
- Wait for the configuration confirmation
Replace the API Key
To replace a configured API Key, run/login again, select Kimi Platform (API key · platform.kimi.ai), and enter the new API Key.
After configuration completes, Kimi Code CLI uses the new API Key.
Troubleshooting
API Key validation fails
Check the following:- The selected platform is where the API Key was created
- The complete API Key was copied without extra spaces
- The API Key is still valid
- The corresponding Kimi API Platform account can call the API
/login again.
/login is unavailable
/login must be run while Kimi Code CLI is idle. If it is generating content or running a task, wait for the task to finish, or press Esc or Ctrl-C to interrupt it before running /login again.
No models are displayed
Confirm that the API Key and selected platform match, then run/login again. If the models still do not load, upgrade Kimi Code CLI and check the Kimi API Platform account status.