Configure IP Whitelist
IP Whitelist is an organization-level security setting on Kimi Open Platform. After organization verification is completed, you can configure an IP whitelist. Once saved, only IP addresses in the whitelist can access APIs under the current organization. API requests from IP addresses outside the whitelist will be denied. When the IP whitelist is empty, API requests are not restricted by source IP. When saved, the current list overwrites the existing configuration.Entry and Permissions
After logging in to Kimi Open Platform, go to Organization Management - Organization Verification from the left sidebar. After verification is completed and the current account has permission, the IP Whitelist entry will be displayed in the upper-right corner of the page.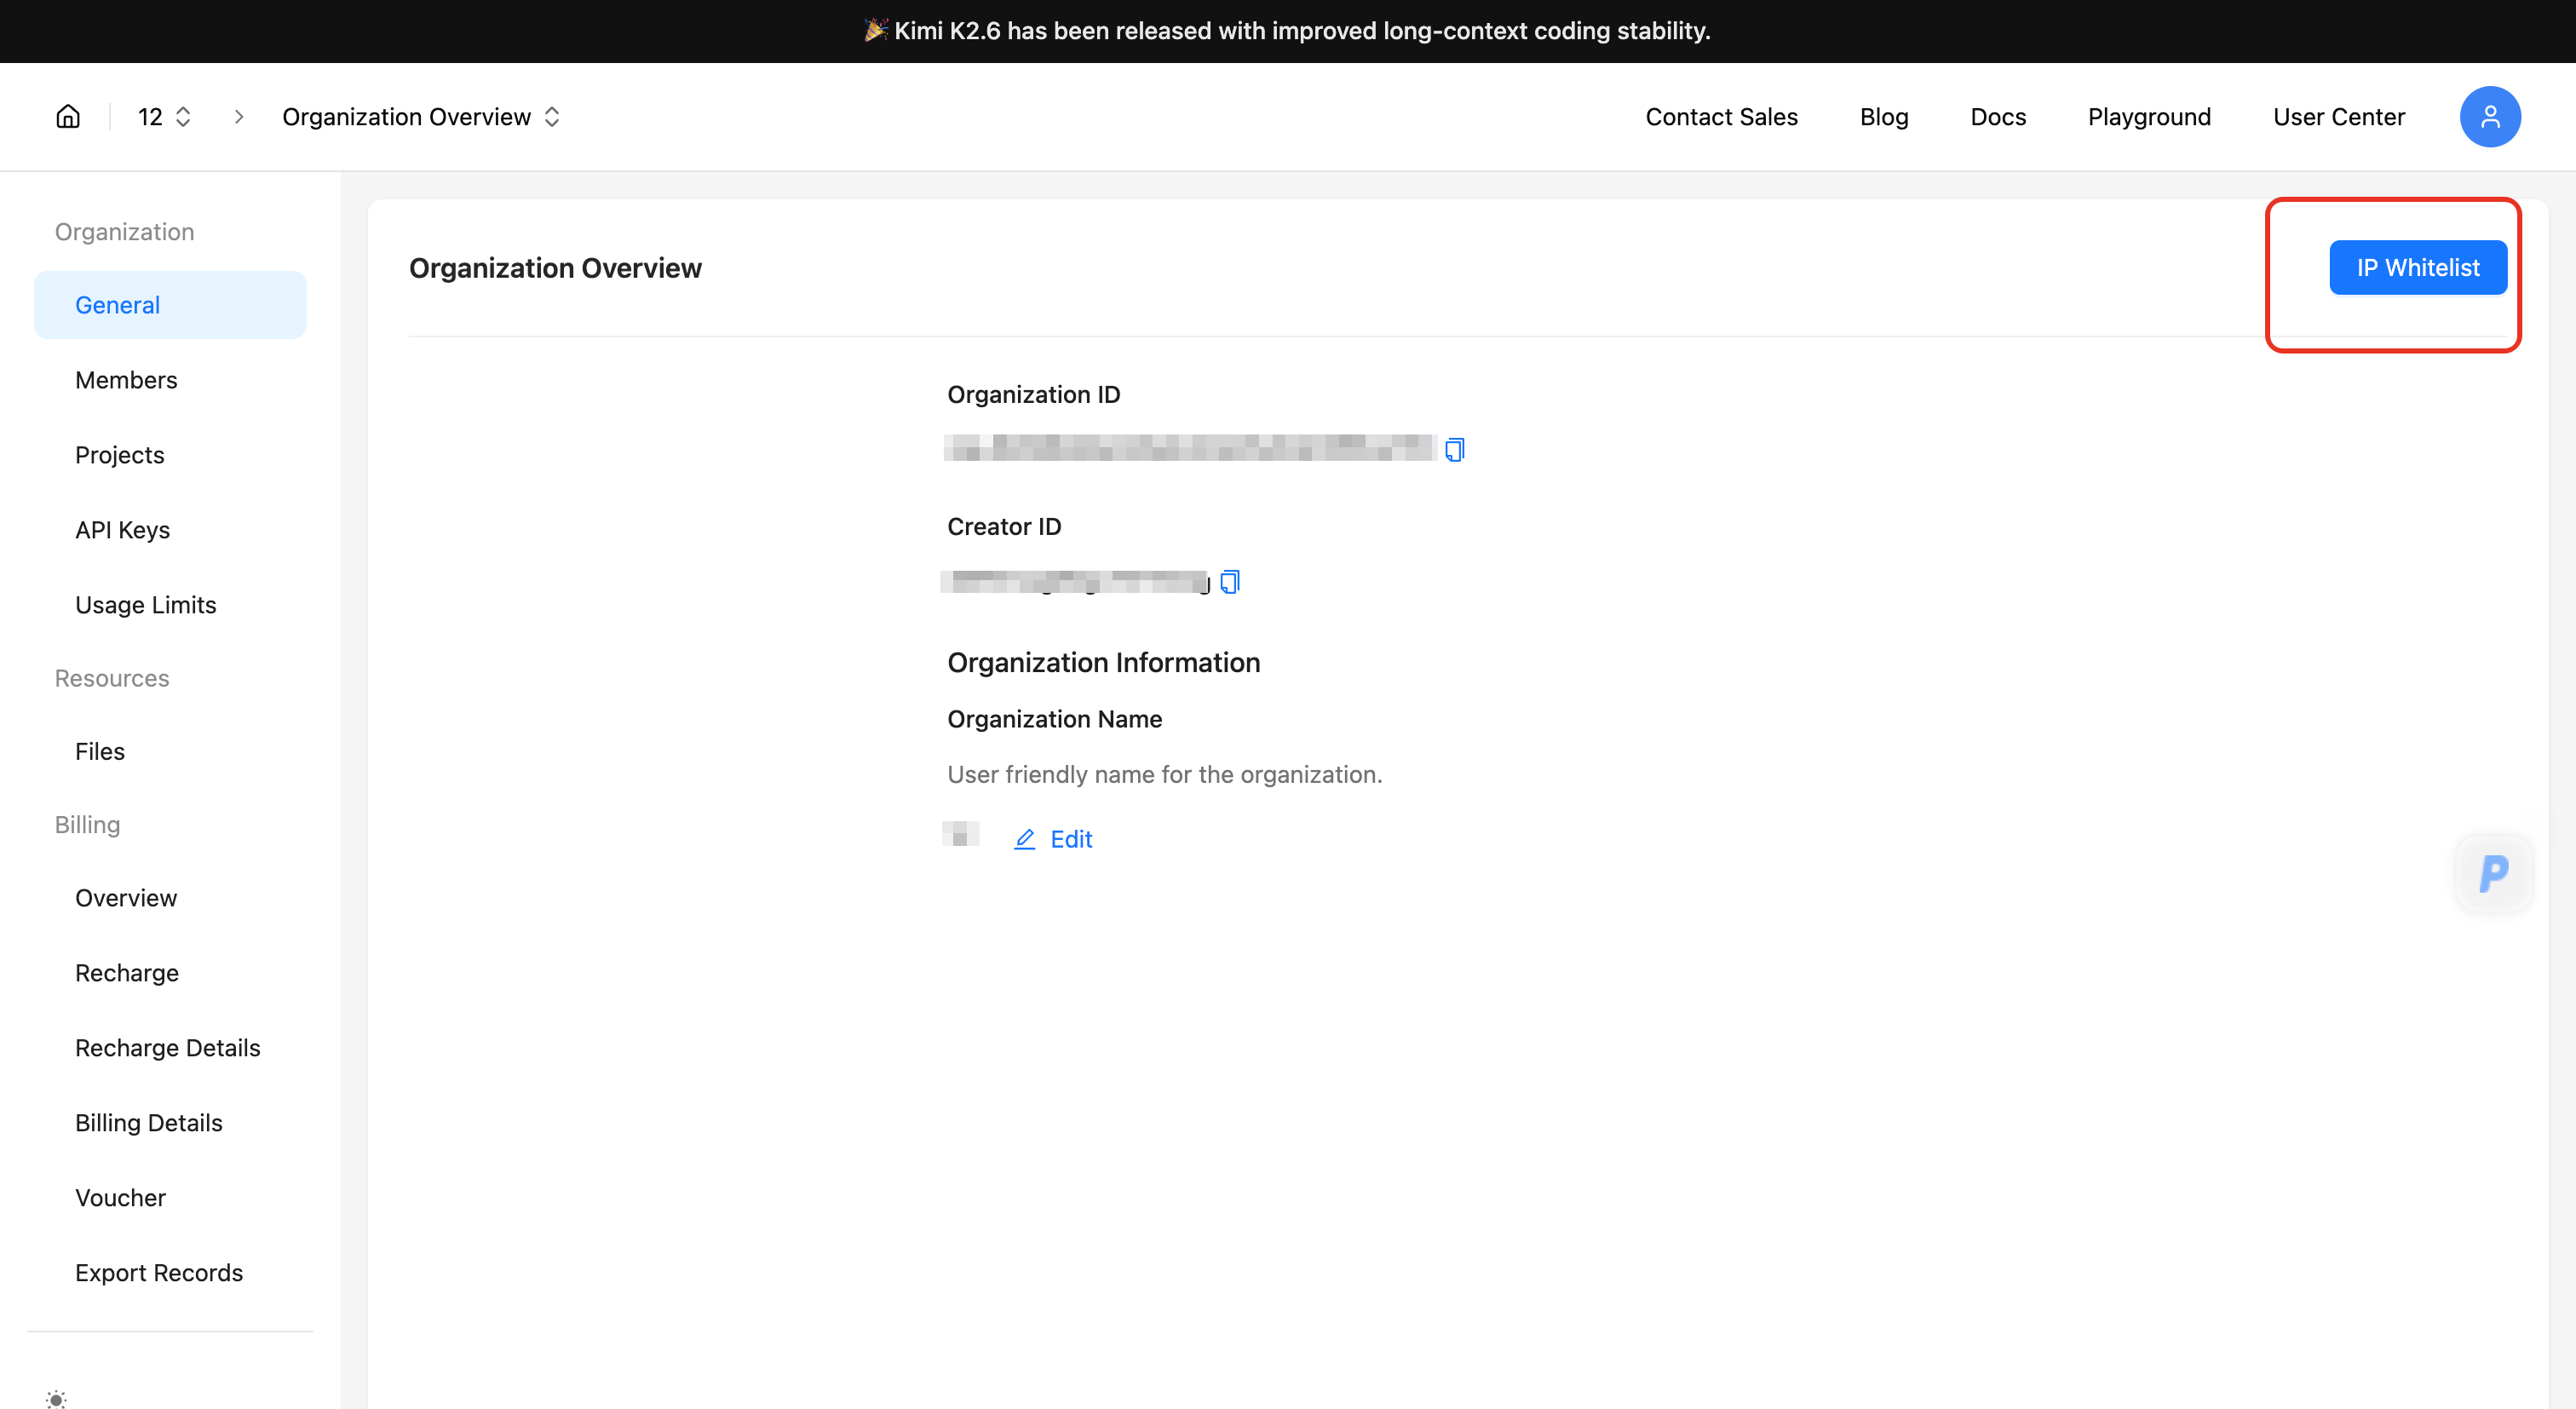
| Organization Status | Entry Displayed | Who Can Configure |
|---|---|---|
| Organization verification not completed | No | None |
| Organization verification completed | Yes | Current organization account |
| Enterprise Verified | Yes | Organization creator, organization administrator |
Fill in the IP / CIDR List
Click IP Whitelist, then fill in the allowed IP addresses or CIDR ranges in the IP / CIDR List field.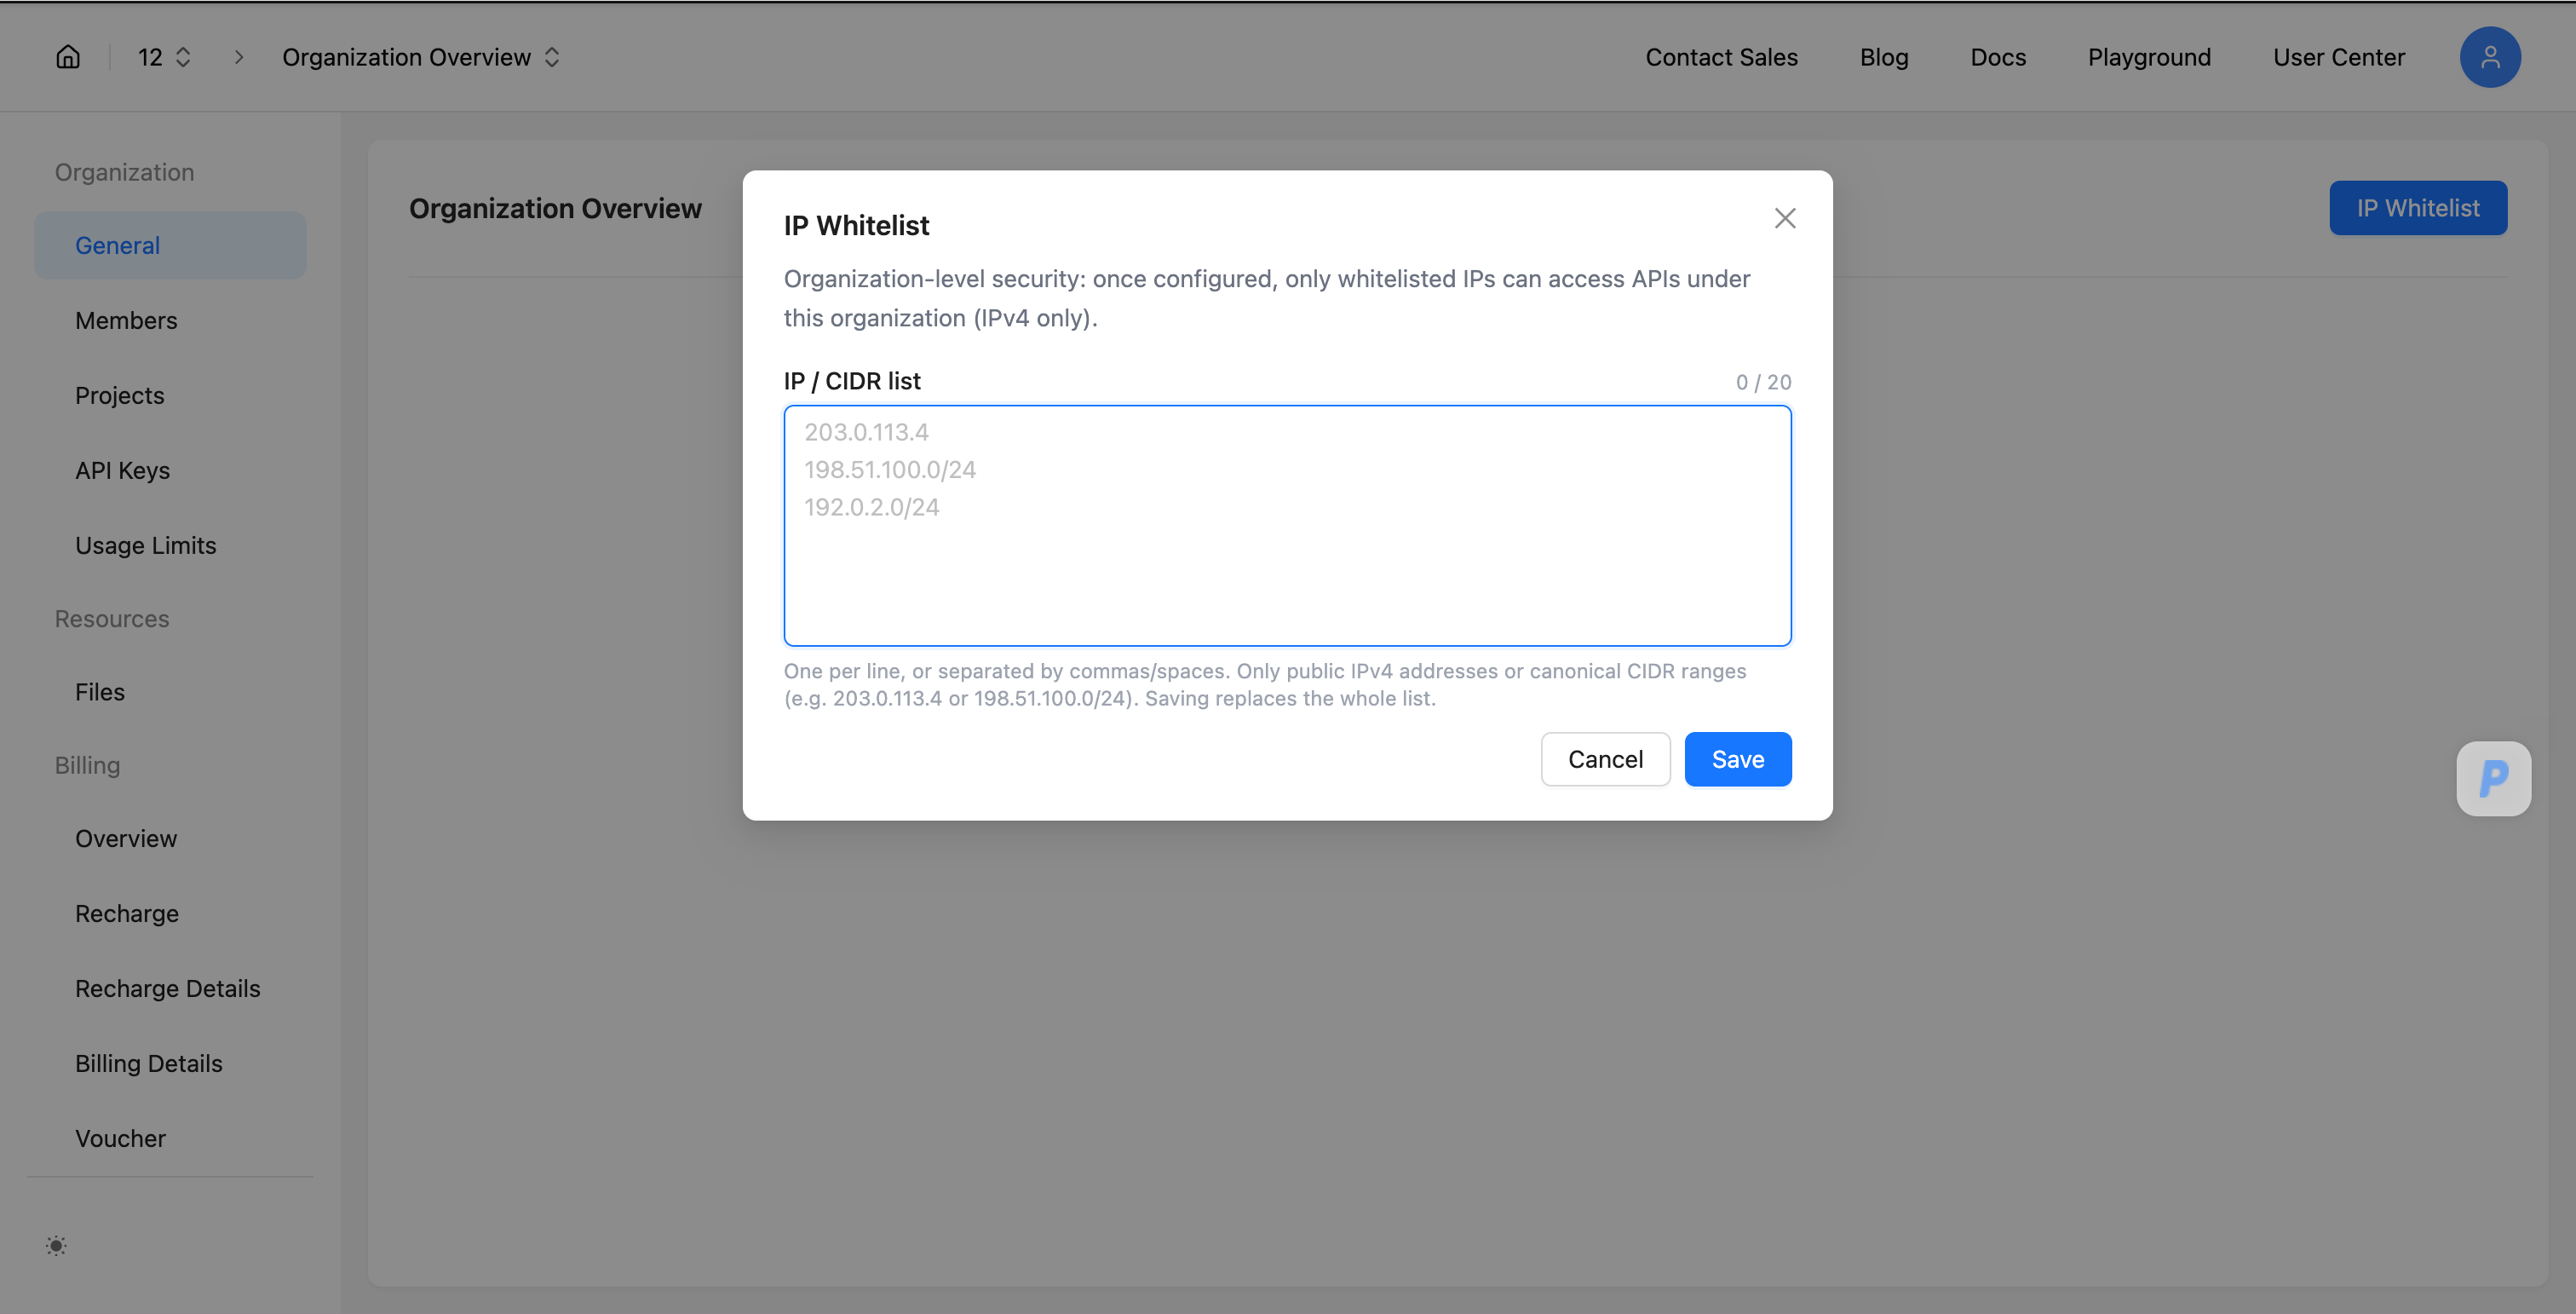
- Enter one item per line. You can also separate items with commas or spaces.
- You can configure up to 20 items.
- Only public IPv4 addresses and valid IPv4 CIDR ranges are supported.
- IPv6 is not currently supported.
- Saving the whitelist overwrites the existing configuration.
Format Validation
The system validates the input before saving. The following items cannot be saved:- IPv6 addresses;
- private IPv4 addresses or private IPv4 ranges;
- loopback addresses, link-local addresses, multicast addresses, reserved addresses, and other non-public IPv4 addresses;
- invalid CIDR ranges;
- lists with more than 20 items.
| Type | Examples |
|---|---|
| Private address or range | 192.168.1.1, 10.0.0.1, 172.16.0.0/12 |
| Carrier-grade NAT shared address | 100.64.0.0/10 |
| Loopback address | 127.0.0.0/8 |
| Link-local address | 169.254.0.0/16 |
| Multicast or reserved address | 224.0.0.0/4, 240.0.0.0/4 |
Clear the IP Whitelist
To remove IP whitelist restrictions, open the IP Whitelist dialog, clear all content in the IP / CIDR List field, and click Save. After the empty list is saved, API access under the current organization will no longer be restricted by IP whitelist checks.Scope
The IP whitelist applies to API access under the current organization. After it is configured, API Keys under the current organization are subject to this whitelist when calling APIs. If your business has multiple network egress points, add all required public egress IP addresses or CIDR ranges to the whitelist.Organization Balance Alert
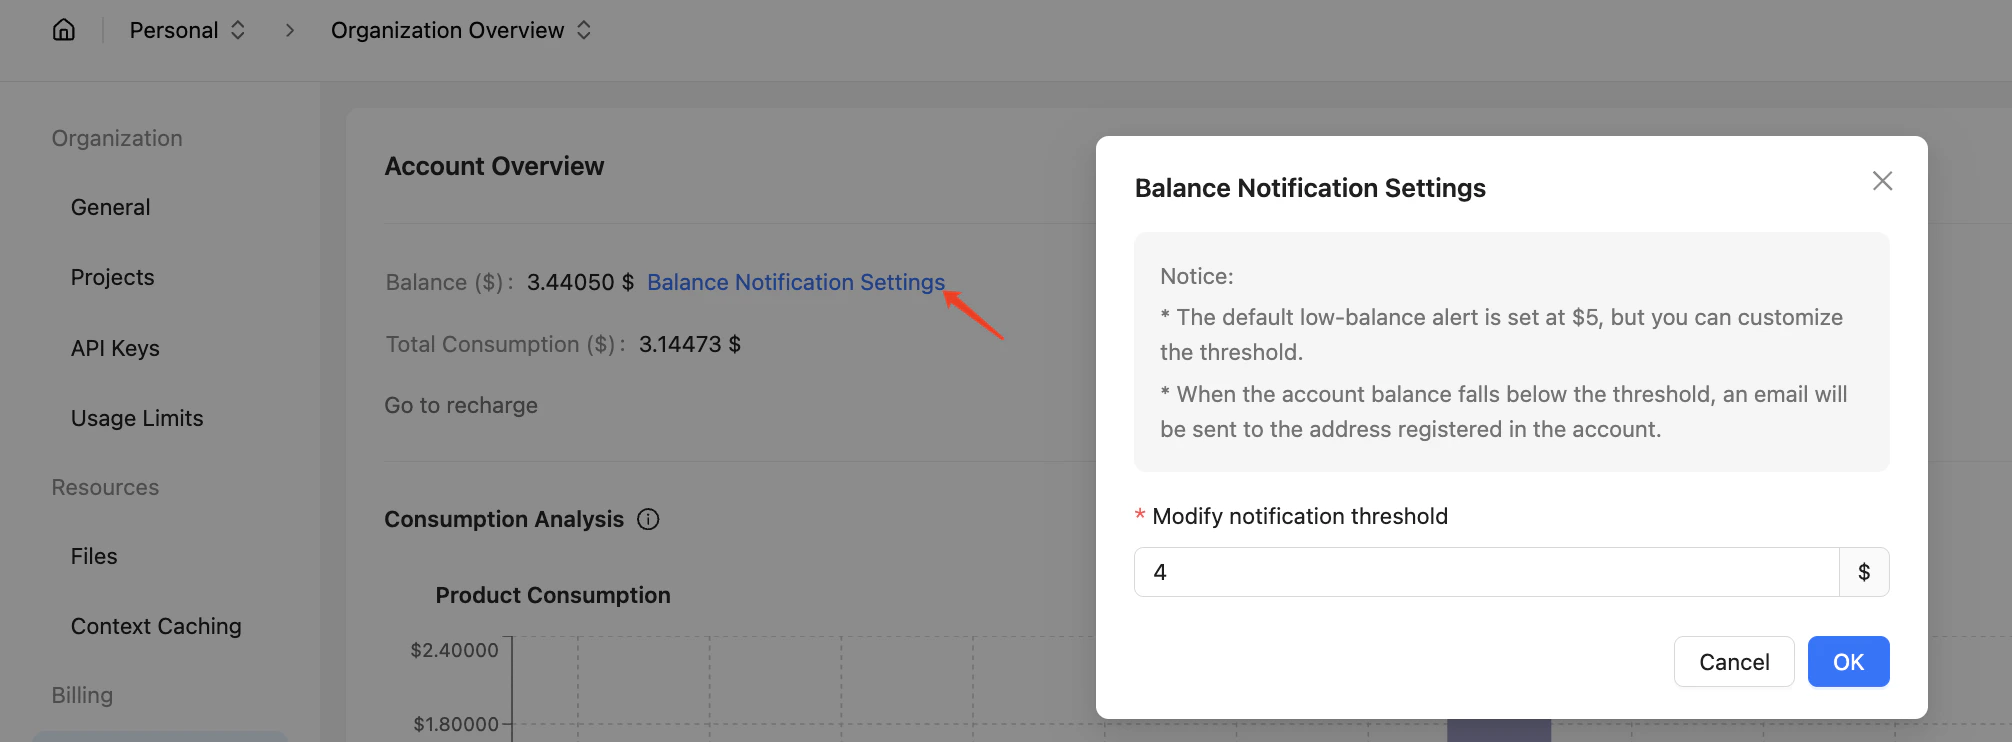
To prevent service interruptions due to insufficient account balance, we recommend configuring balance alerts in the Organization Management Settings.- The platform provides customizable balance alert thresholds, with a default setting of $5
- When your account balance drops below the configured threshold, the system will automatically send notification emails to the organization’s registered email address
Managing Projects and Usage Limits
To meet the needs of multiple business product lines under a single organization, or to distinguish between production and testing environments, you can create multiple projects under your organization. Within each project, you can create an API Key. The calls made using the project’s API Key will be recorded under the project’s consumption, allowing you to independently manage the usage of different projects.Project Balance and Rate Limiting
- All projects under an organization share the organization’s rate limits.
- All projects under an organization share the organization’s account balance.
Project Consumption Management
- The platform now supports setting monthly and daily consumption budgets on a per-project basis. You can set the monthly or daily consumption limits for each project on the Project Management - Project Settings - Project Budget/Rate Limiting Settings page. Once the API Key consumption within a project reaches the set budget, any subsequent API requests for that project will be denied, effectively helping you manage your business budget. Due to billing cycle issues, the actual enforcement of these limits may have a delay of about 10 minutes.
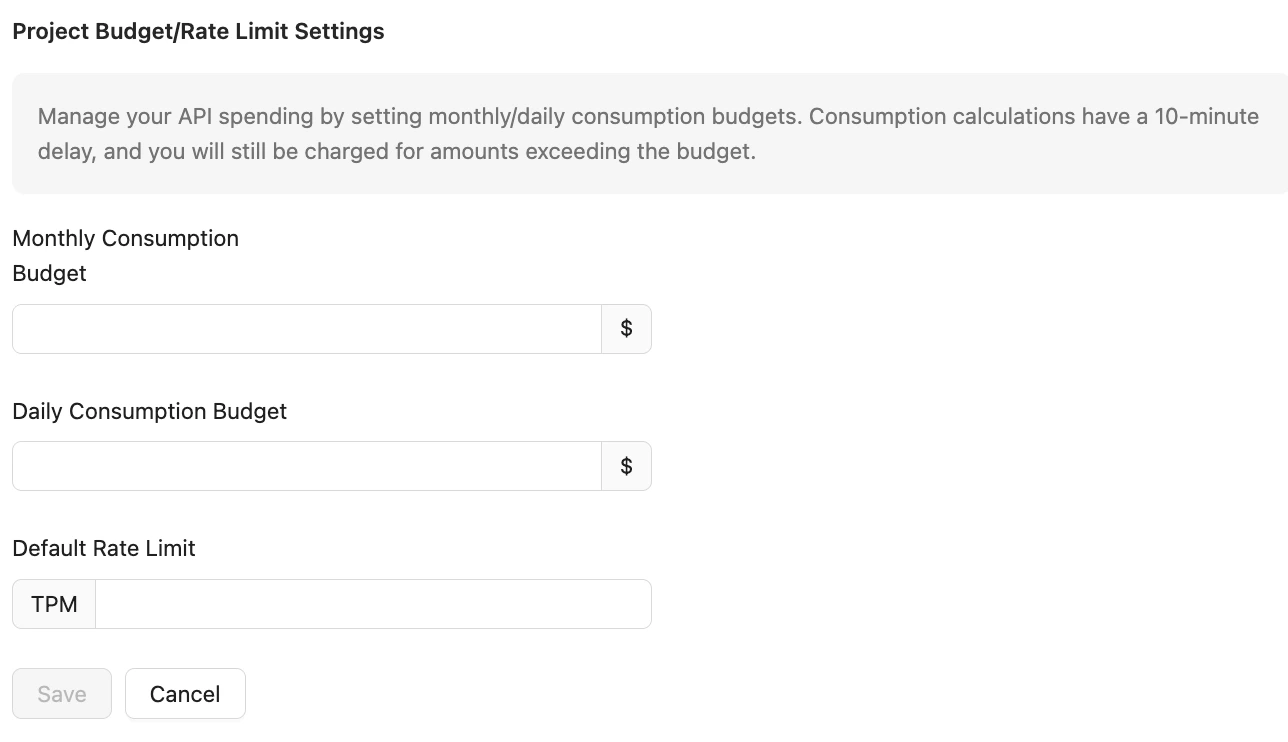
- If you wish to limit the maximum TPM (Transactions Per Minute) for a single project, you can configure the project’s TPM rate limit independently. If the project’s API Key requests reach this TPM, the requests will be denied. (The project’s TPM must not exceed the organization’s TPM. If you set a value higher than the organization’s TPM, the organization’s TPM will be used for rate limiting.)
- The platform also provides an overview page for both the organization and individual projects, offering consumption analysis at both levels to help you get a clear understanding of your organization’s spending.
Project Quantity Limitations
The number of projects your organization can create depends on the type of organization verification. The upper limits for different verification types are as follows:| Organization Type | Project Limit | API Key Limit |
|---|---|---|
| Default | 20 | 50 |
| Enterprise Verified | 50 | 100 |
Member Management
Organization Member Management
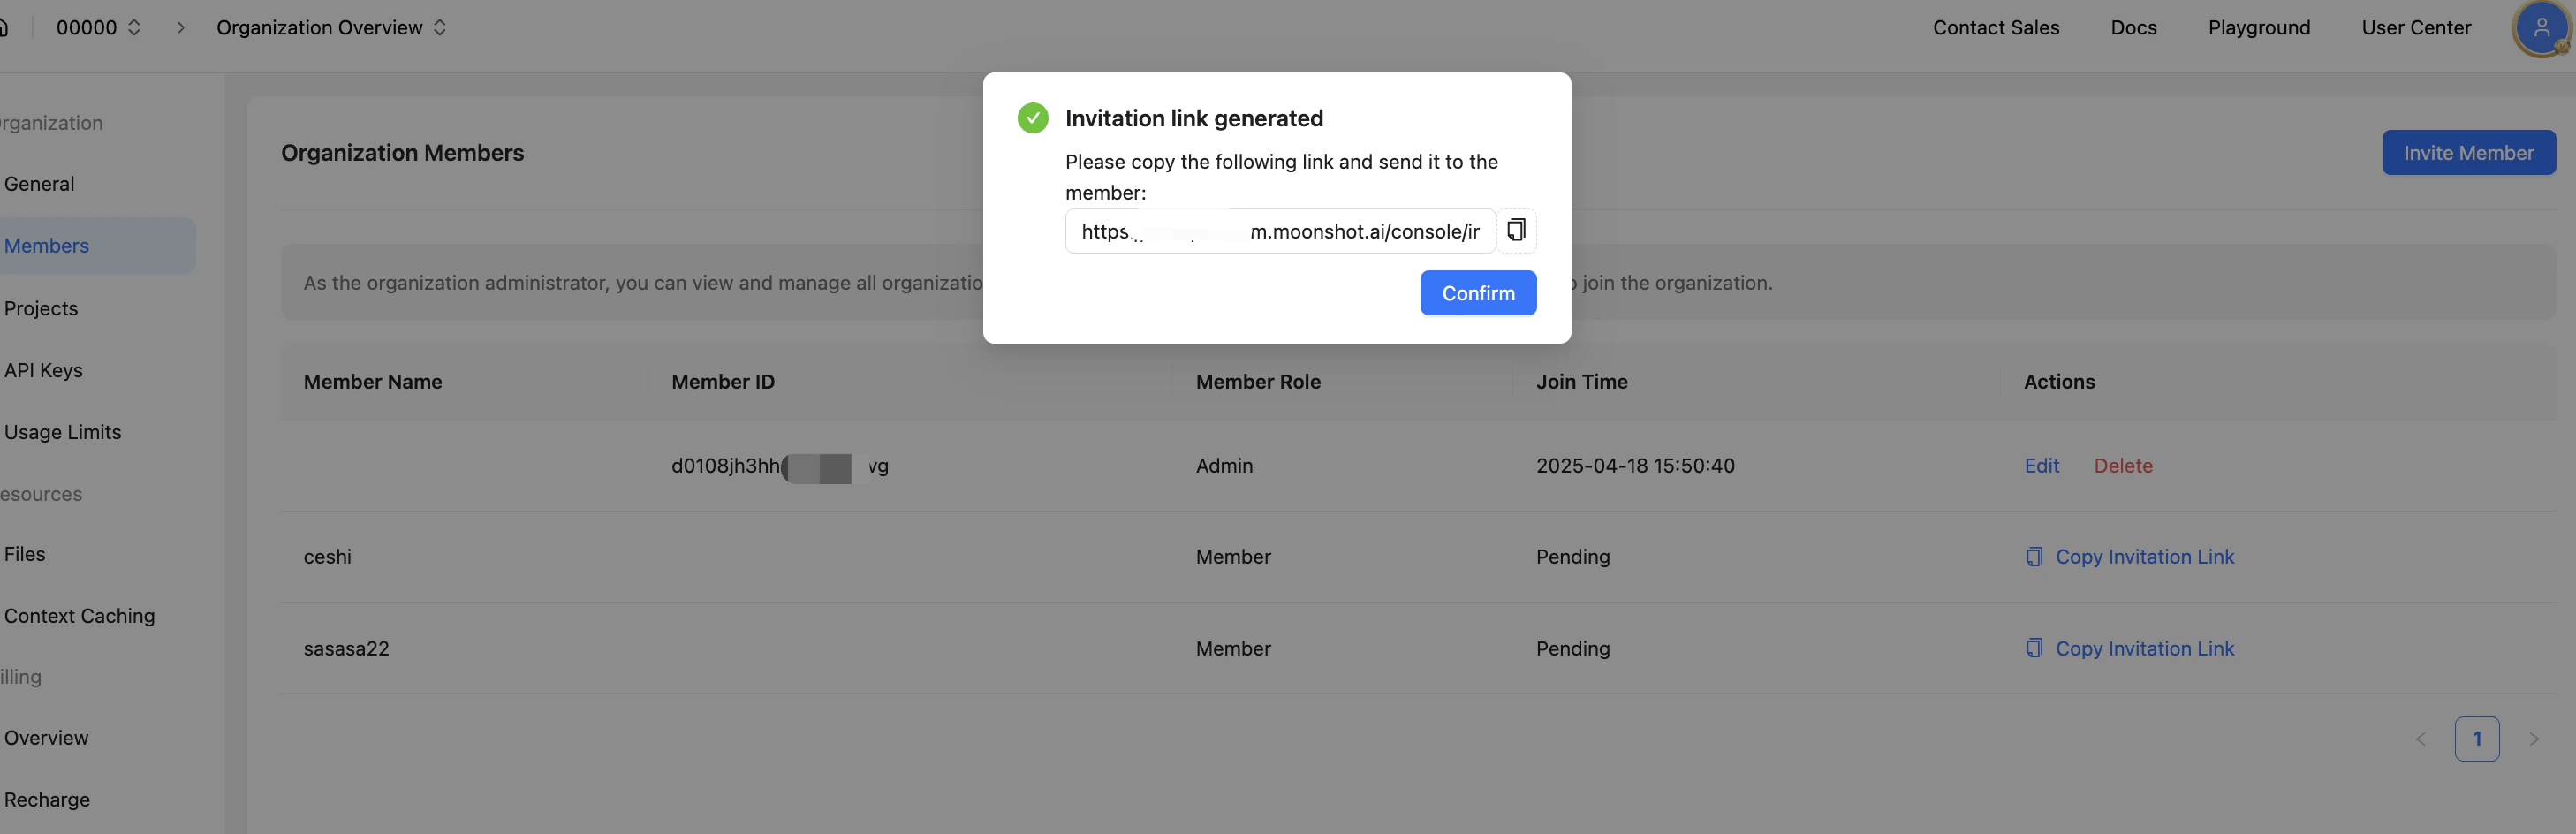
To help you manage your organization, you can invite new members on the Organization Management - Member Management page. The platform generates a dedicated invitation link for each new member. The invitee can use this link to register and log in to the Open Platform and join your organization.Note: Please visit the Set Organization Information page to maintain your organization’s info and complete your enterprise verification as a prerequisite.
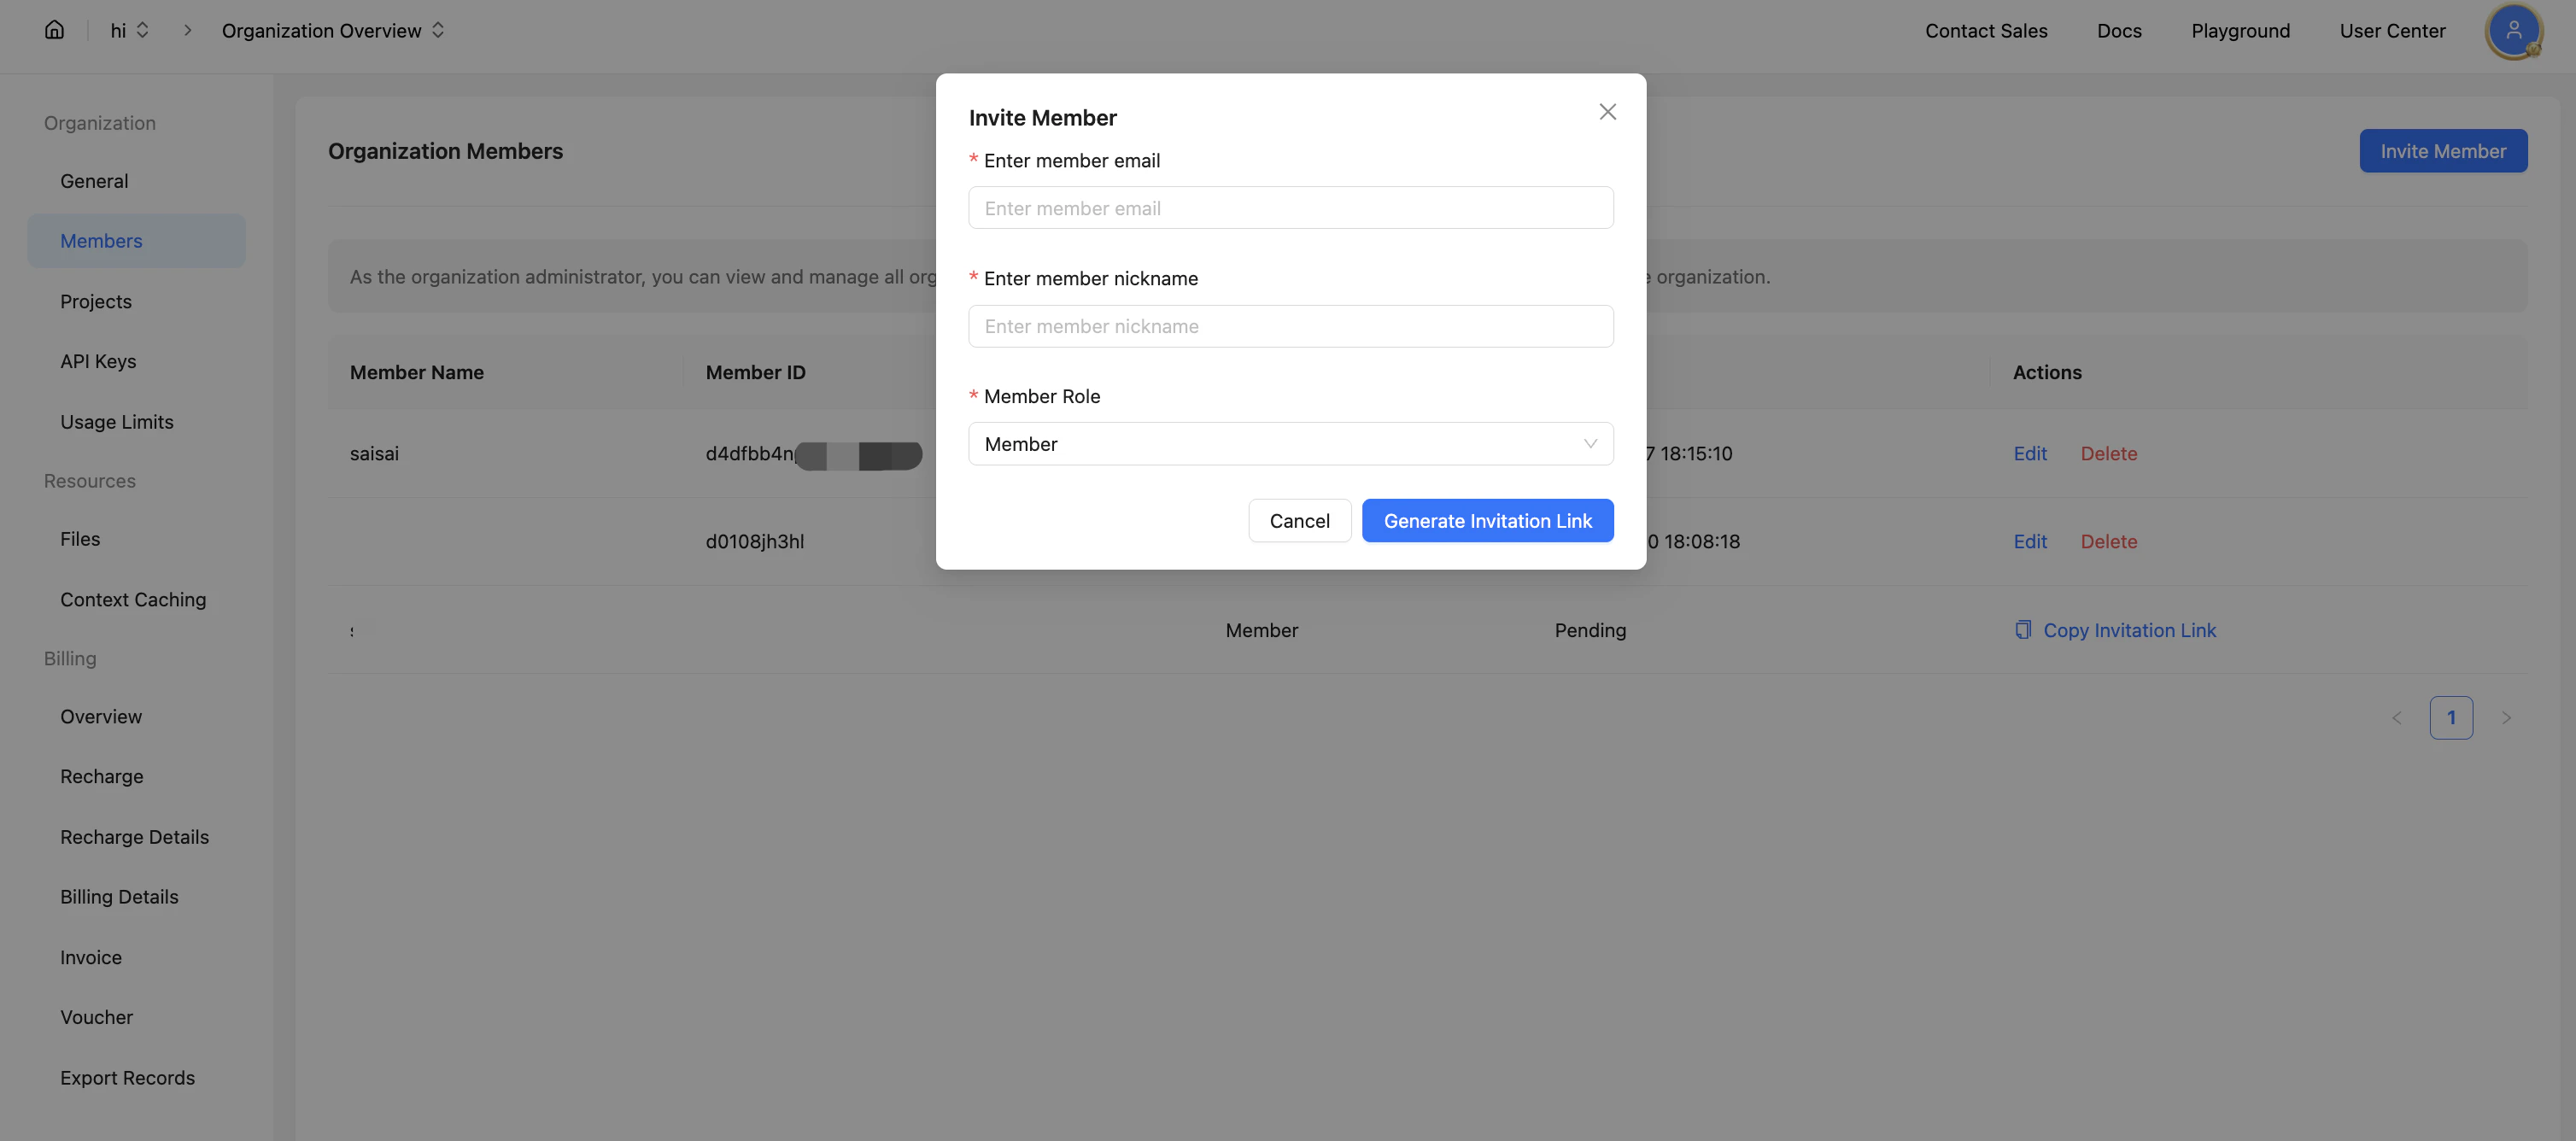
- Organization Administrator: The organization creator is the default administrator. Administrators can create projects, invite and manage members, and issue invoices.
- General Member: General members can only view projects. They must be invited to join a project to gain access to project resources.
Project Member Management
Organization administrators can create projects and invite organization members to join and help manage projects. Project members can create their own API Keys within the project to utilize project resources.- Project Administrator: Can manage project budget/rate limits/consumption notifications, invite members, and create API Keys.
- General Project Member: Can only view projects / create API Keys.